Over the past few previous posts here on the blog I’ve been talking about Python & Flask and how I sort of got stuck today on Chapter 4 of an O’Reilly book on Flask when the author decided to throw in a 3rd party library for handling basic networking that ended up throwing me off (along with a few other choices the author made). Well… I’ve finally figured out what I’m doing and figured out how to handle basic networking in Python using Flask the way *I want to do things*.
In my opinion, you shouldn’t need a third party library to handle networking in a web-app. The whole point of learning Flask over something like Django was the simplicity of everything. So here I present: Simple Networking in Python with Flask
Author: topherPedersen
How to Setup a New Flask App on a Local Windows Machine
Another quick little blog post here for my own future reference. I’m just getting started learning Flask and it’s quite different from doing web development in PHP like I’m used to. So here are a few quick steps to get started (assumes virtualenv and python 3 have already been installed):
Create a Blank Flask App
$ cd Desktop
$ mkdir my_new_flask_app
$ cd my_new_flask_app
$ virtualenv venv
$ venv\Scripts\activate
(venv) $ pip install flask
Hello, World (helloflask.py)
from flask import Flask
app = Flask(__name__)
@app.route('/')
def index():
    return 'hello, world'
Start Local Development Server
$ set FLASK_APP=helloflask.py
$ flask run
Visit Your New App With Your Web Browser: http://localhost:5000
Keeping it Simple, Stupid: Handling HTTP GET & POST Requests in Python with Flask
TLDR: Skip To The Bottom of This Post/Rant for the Answer to Handling HTTP POST & GET Requests in Python with Flask (the Easy Way)
Just sort of wanted to vent here for a minute… I’m working out of Miguel Grinberg’s Flask Web Development (2nd Edition) trying to teach myself Flask and I’m really frustrated: I’m only on Chapter 4 and this guy has already thrown in Bootstrap and another 3rd party library (Flask-WTF) and the examples are quickly growing in complexity to the point where I’m having trouble following along. I wish authors would just keep things as simple as possible. There’s no need to use every feature, and every library, when writing a programming book or tutorial. Programming is complicated enough.
O well I suppose. I got a lot out of the first three chapters, but it looks like I’m going to have to move on to another book to keep learning. Tossing in this Flask-WTF library and using the ‘extends’ and ‘block’ features in the Jinja2 templates just makes it too confusing as a complete beginner. I’m sure that the ‘extends’ and ‘block’ features are nice to have, but they aren’t appropriate this early in a programming tutorial. Just demonstrate how to do something in its most simplest form.
TAKEAWAY: Read all the programming books on a given subject. Take what you can from each book, and move on to the next when necessary.
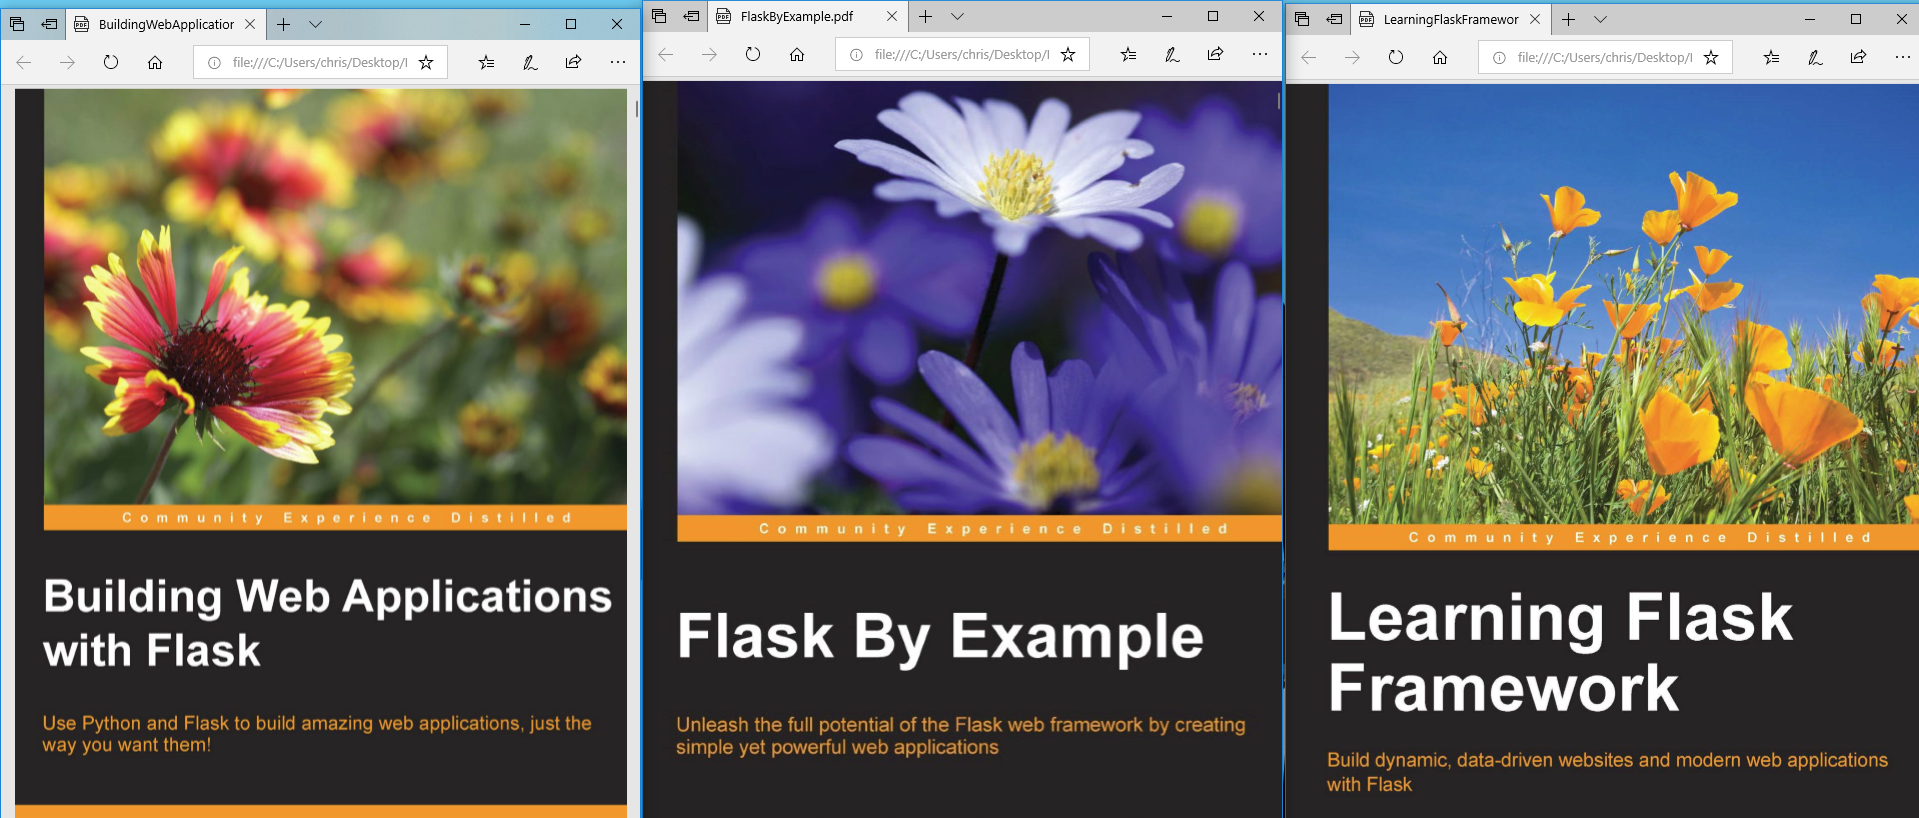
UPDATE: Here are the three other books on Flask which I’m planning on diving into tonight–
- Building Web Applications with Flask by Italo Maia
- Flask by Example by Gareth Dwyer
- Learning Flask Framework by Matt Copperwaite & Charles Leifer
UPDATE: Okay, so two of the three new books also jump straight into handling HTTP GET & POST Requests using Flask-WTF, but luckily Flask By Example kept things simple and demonstrated the simplest way to handle networking requests. Need to grag some GET or POST data? Simply call:
# Retrieve Data from an HTTP GET Request
from flask import request
username = request.args.get("username")
# Retrieve Data from an HTTP POST Request
# Additional Reference: https://bit.ly/2HsJtD1
# Note, we are using HTTP POST, However the
# Method Name is Still .get()
# A Bit confusing eh?
from flask import request
username = request.form.get("username")
password = request.form.get("password")
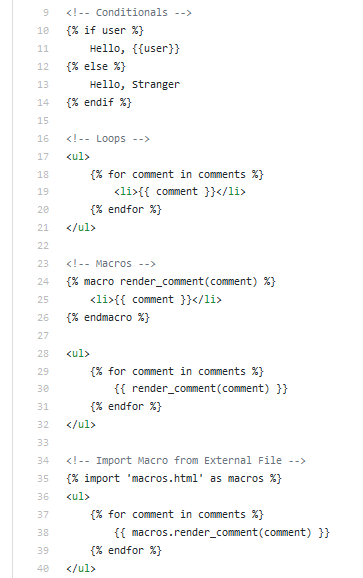
Jinja2 Control Structures
Another quick little post here for my own personal reference. Working out of Miguel Grinberg’s Flask Web Development (2nd Edition) trying to teach myself a little Flask for a new project on which I’m working, so here is a little code straight from Grinberg’s book demonstrating the basics of using control structures in Flask’s Jinja2 templating language:
How to Restart Your Flask Development Server on Windows
Quick little post here for my own personal reference on how to restart your Flask development server on Windows:
1) $ cd Desktop/YourFlaskProjectDirectory
2) $ venv\Scripts\activate
3) $ set FLASK_APP=your_main_flask_script.py
4) $ flask run
5) Visit http://localhost:5000/ in your browser
Dumping Django for Flask
Spent my day off today diving into Django and have found myself quite frustrated with the whole thing. Working through the official Django quick-start tutorial I keep finding myself thinking: How complicated does “hello, world” have to be?
I’ve often heard neckbeards on the internet proclaim you “can’t judge something by it’s hello, world.” I call B.S. Judge languages and frameworks by how difficult it is to go from zero to hello, world. If the authors of a language or framework make your life miserable getting to hello, world, you can count on the fact that they aren’t going to make anything else any easier.
Coming from PHP I know that I am spoiled. Nothing is easier than going from zero to hello, world with PHP! Unfortunately for my latest project I need to either use Python, Ruby, or Node.js. So it looks like I’m going to go ahead and give Flask a try. I will make sure to write up another post about Flask if I end up liking it, or if I find something else wonderful I’ll go ahead and post about that instead. Stay tuned!
UPDATE: I got the Flask “hello, world” all up and running following along with Miguel Grinberg’s Flask Web Development (2nd Edition) from O’Reilly and found it much easier to wrap my head around how everything works compared to Django. Simplicity is of great importance to me, so I think I’ve made the right choice. If you happened to stumble upon this blog post by searching for “Django vs. Flask” or something along those lines, I think you’ll find Flask the better option if you prefer keeping things as simple as possible.
SyntaxError: Generator expression must be parenthesized
This blog post is brought to you by the developer of BitBudget. BitBudget is an automated budgeting app for Android and iOS which syncs with your bank account and helps you avoid overspending. If you’d like to quit living paycheck-to-paycheck and get a better handle on your finances, download it today! https://bitbudget.io
I’ve been trying to teach myself a little Django here over the past few days for a new side project I’m working on that requires Python instead of my usual goto language PHP. I was attempting to run Django 1.11.11 on my Windows machine running Python 3.7.1 and ran into the following error (SyntaxError: Generator expression must be parenthesized) when attempting to run the built-in Django development server. According to one StackOverflow post the problem is that Django 1.11.11 isn’t compatible with Python 3.7.1. If you happened to have stumbled upon this blog post searching for an answer to this error message, I suggest uninstalling Django and reinstalling the latest version of Django 1 which happens to be Django 1.11.20 (NOT 1.11.11), or simply upgrade to Django 2.
Personally, I was attempting to run Django 1.11.11 because that is the version of Django that comes with the DigitalOcean Django server droplet image. Going forward I’m going to try running 1.11.20 on my Windows machine and see how that goes, as I would prefer to stick with using DigitalOcean’s pre-configured Django server droplet images as opposed to setting everything up from scratch myself.
FatCamp: Win Bitcoin Cash Competing in 7 Day Fitness Challenges
Working on a new app idea called FatCamp that shares a lot of the code I’ve been writing for another project, WingsuitGP. Both of the apps are location based and revolve around competition, so the ideas are very much related when it comes to the code I’m having to write for both. I’m still sort of working the idea for FatCamp out in my head, but I wanted to jot down a few ideas here on the blog to help guide the creative process:
FatCamp: Win Bitcoin Cash Competing in 7 Day Fitness Challenges
- The Challenge is simple, complete 5 workouts (bike or run) in 7 days and win BitcoinCash (100 mBCH)
- Skip workouts, and we will fat shame you via text message reminding you to go work out
- Accept Challenge
- Start Workout
- Receive BitcoinCash Prize Money via SMS with CoinText
Prize Money:
- First 10 Users– 100mBCH ($12 Per User, $120 Per Week)
- Next 100 Users– 10mBCH ($1.20 Per User, $120 Per Week)
- Next 1000 Users– 1 mBCH ($0.12 Per User, $120 Per Week)
Paid Competitions:
- Pay $12 – $120 Per Contest (Compete Against Strangers or Against Friends)
- Friends (or Strangers) who miss workouts lose their entry fees, while those who don’t win money.
Inspiration: The Sober October Fitness Competition on the Joe Rogan Experience Podcast
UPDATE: I took my prototype FatCamp iOS app on a run tonight using an arm band and it wasn’t a very good experience at all. While there may be many more potential iPhone users than Apple Watch users, I think the experience on the Apple Watch would be a lot better. I honestly did not enjoy jogging around with the clunky arm band. I think the next step going forward is going to be rewriting the FatCamp prototype as a watchOS app.
How to Generate JSON Dynamically in Swift using Dictionaries, and then Send that Data Over the Internet using the Alamofire Networking Library/Wrapper for iOS
This blog post is brought to you by the developer of BitBudget. BitBudget is an automated budgeting app for Android and iOS which syncs with your bank account and helps you avoid overspending. If you’d like to quit living paycheck-to-paycheck and get a better handle on your finances, download it today! https://bitbudget.io
After a fruitful late night hacking session, I’ve finally figured out how to dynamically create JSON in Swift using dictionaries, and then how to send that JSON data over the network to a backend server running PHP. I’ve published something like five blog posts on this topic over the past week, but this is my final answer!
If you haven’t read any of my other posts on this topic, the problem which I kept running into was that I needed to generate a fairly large JSON object with an indeterminate number of items. So naturally, I needed to be able to generate the JSON dynamically using a simple for-loop. However, in Swift you need to generate your JSON using dictionaries which as you probably know, can only use strings for keys! How are you suppose to dynamically generate a large number of items without using numbers to identify the individual pieces of data? Well as one user on StackOverflow cleverly pointed out, you can simply turn your indices into strings by wrapping them in quotes! (Technically you call the String() method, but you get the idea). So 1 becomes “1”! That’s all there is to it.
So here it is, my final sample app demonstrating how to generate JSON with Swift and then send it over the internet to a backend server running PHP:
Single View (Main.storyboard)
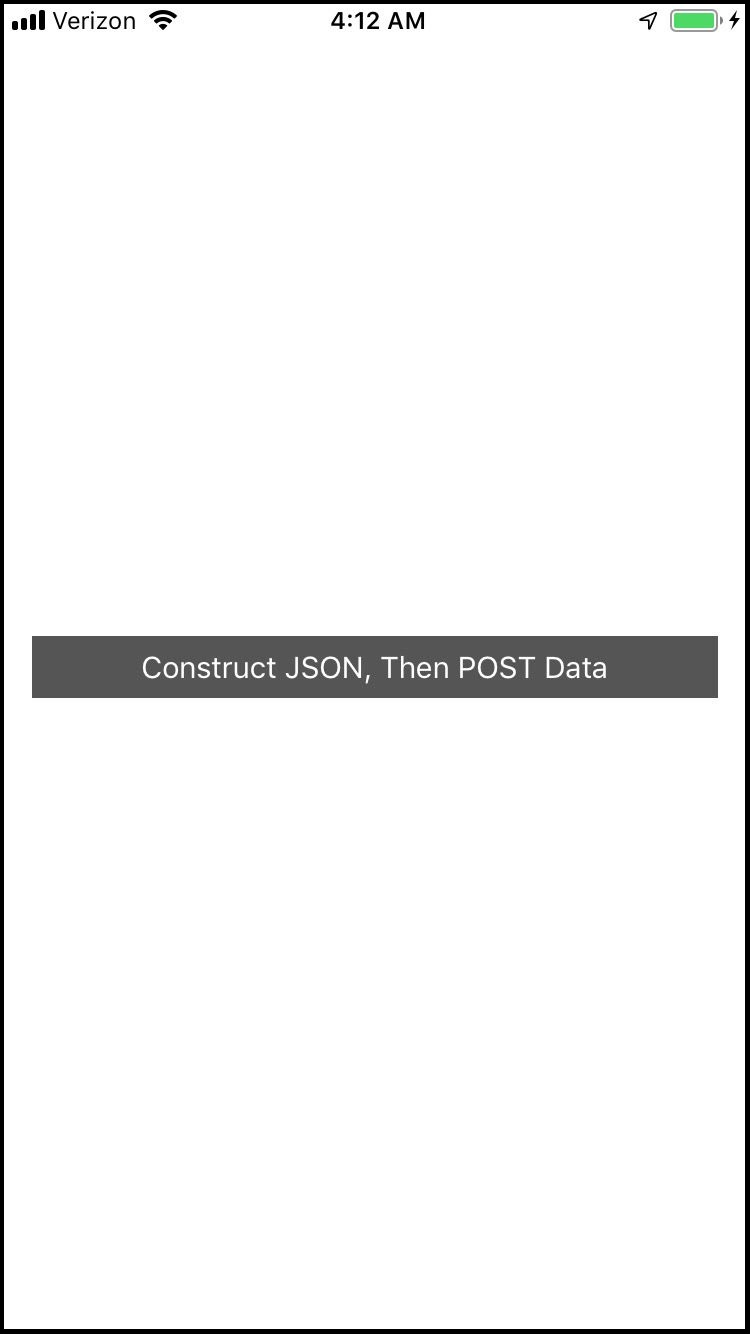
ViewController.swift
//
//  ViewController.swift
//  JSONxAlamofire
//
//  Created by Christopher Pedersen on 3/3/19.
//  Copyright © 2019 Christopher Pedersen. All rights reserved.
//
import UIKit
import Foundation
import Alamofire
class ViewController: UIViewController {
    override func viewDidLoad() {
        super.viewDidLoad()
        // Do any additional setup after loading the view, typically from a nib.
    }
    @IBAction func onButtonClick(_ sender: Any) {
        let numberOfDataPoints: Int = 99
        // Note, numberOfDataPoints is actually an inaccurate name.
        // However, I don't have time to fix it right now.
        // The variable would be more accurately named something like
        // numberOfDataPointsMinusOne.
        var parameters: [String:Any] = [
            "numberOfDataPoints": numberOfDataPoints,
            "firstTypeOfData": [:],
            "secondTypeOfData": [:]
        ]
        var subDictionaryA: [String:Any] =
            [:]
        for i in 0...numberOfDataPoints {
            let indexAsString: String = String(i)
            subDictionaryA[indexAsString] = ["foo": Int.random(in: 1...100), "bar": Int.random(in: 1...100), "baz": Int.random(in: 1...100)]
        }
        var subDictionaryB: [String:Any] = [:]
        for i in 0...numberOfDataPoints {
            let indexAsString: String = String(i)
            subDictionaryB[indexAsString] = ["foo": Int.random(in: 1...100), "bar": Int.random(in: 1...100)]
        }
        parameters["firstTypeOfData"] = subDictionaryA
        parameters["secondTypeOfData"] = subDictionaryB
        Alamofire.request("http://wingsuitgp.com/networkingtest2.php", method: .post, parameters: parameters, encoding: JSONEncoding.default).response { response in
            if let data = response.data, let utf8Text = String(data: data, encoding: .utf8) {
                print("Server Repsonse: \(response)") // print server response to console
            } else {
                print("ERROR: PC LOAD LETTER") // cryptic error message
            }
        }
    }
}
networkingtest2.php
// Receive JSON Data Via HTTP POST
$data = json_decode(file_get_contents('php://input'));
$numberOfDataPoints = $data->{'numberOfDataPoints'};
// Note, $numberOfDataPoints is actually a misleading name.
// Since the index starts at zero, this number is actually
// the highest number, but is not actually the number of data points.
// A more accurate name would be $numberOfDataPointsMinusOne.
// Don't have time to change the name of this variable right now so...
// o well!
if ($numberOfDataPoints connect_error) {
    die("Connection failed: " . $conn->connect_error);
}
// Insert First Type of Data into MySQL Database
for ($i = 0; $i {'firstTypeOfData'}->{"$i"}->{'foo'};
	$bar = $data->{'firstTypeOfData'}->{"$i"}->{'bar'};
	$baz = $data->{'firstTypeOfData'}->{"$i"}->{'baz'};
	$stmt = $conn->prepare("INSERT INTO networkingtest_table (datatype_column, foo_column, bar_column, baz_column) VALUES (?, ?, ?, ?)");
	$stmt->bind_param("siii", $datatype, $foo, $bar, $baz);
	$stmt->execute();
    $stmt->close();
}
// Insert Second Type of Data into MySQL Database
for ($i = 0; $i {'secondTypeOfData'}->{"$i"}->{'foo'};
	$bar = $data->{'secondTypeOfData'}->{"$i"}->{'bar'};
    $baz = 0;
	$stmt = $conn->prepare("INSERT INTO networkingtest_table (datatype_column, foo_column, bar_column, baz_column) VALUES (?, ?, ?, ?)");
	$stmt->bind_param("siii", $datatype, $foo, $bar, $baz);
	$stmt->execute();
    $stmt->close();
}
// Close MySQL Database Connection
$conn->close();
echo "data_received"; // echo server response back to client iPhone app
"Code is Power"– Naval Ravikant
This blog post is brought to you by the developer of BitBudget. BitBudget is an automated budgeting app for Android and iOS which syncs with your bank account and helps you avoid overspending. If you’d like to quit living paycheck-to-paycheck and get a better handle on your finances, download it today! https://bitbudget.io
I was listening to this great talk by Naval Ravikant tonight on YouTube after arriving back home in Dallas from a long day trip to Austin and back to see my son, and was getting ready to go to bed, but Naval has me fired up! It’s 1:30AM and I’m off to 7/11 to pickup some diet energy drinks and ready to do some late night hacking, because “code is power”:
“What can you do? What can you do that’s different. What can you do that’s better? What can you do that maybe the rest of the world is not willing to do? And one thing I would argue that more so than any other point in the history of our society, code is power. It is the new literacy. The personal computer is the most powerful tool ever invented by mankind since maybe the fire or the stone axe. And I would put it above the steam engine. I would put it above flight. I would put it above cars. I would put it above electricity. The reason is that all those other things were group efforts. You needed somebody else’s permission to use those tools. Even the printing press. No individual could run the printing press on their own. Or you would have publishers in the way. The personal computer and the internet are the first time since the invention of fire or the stone axe where you can do it all by yourself with nobody else’s permission.” — Naval Ravikant